How to Do a Glute Bridge: Correct Form, Step by Step
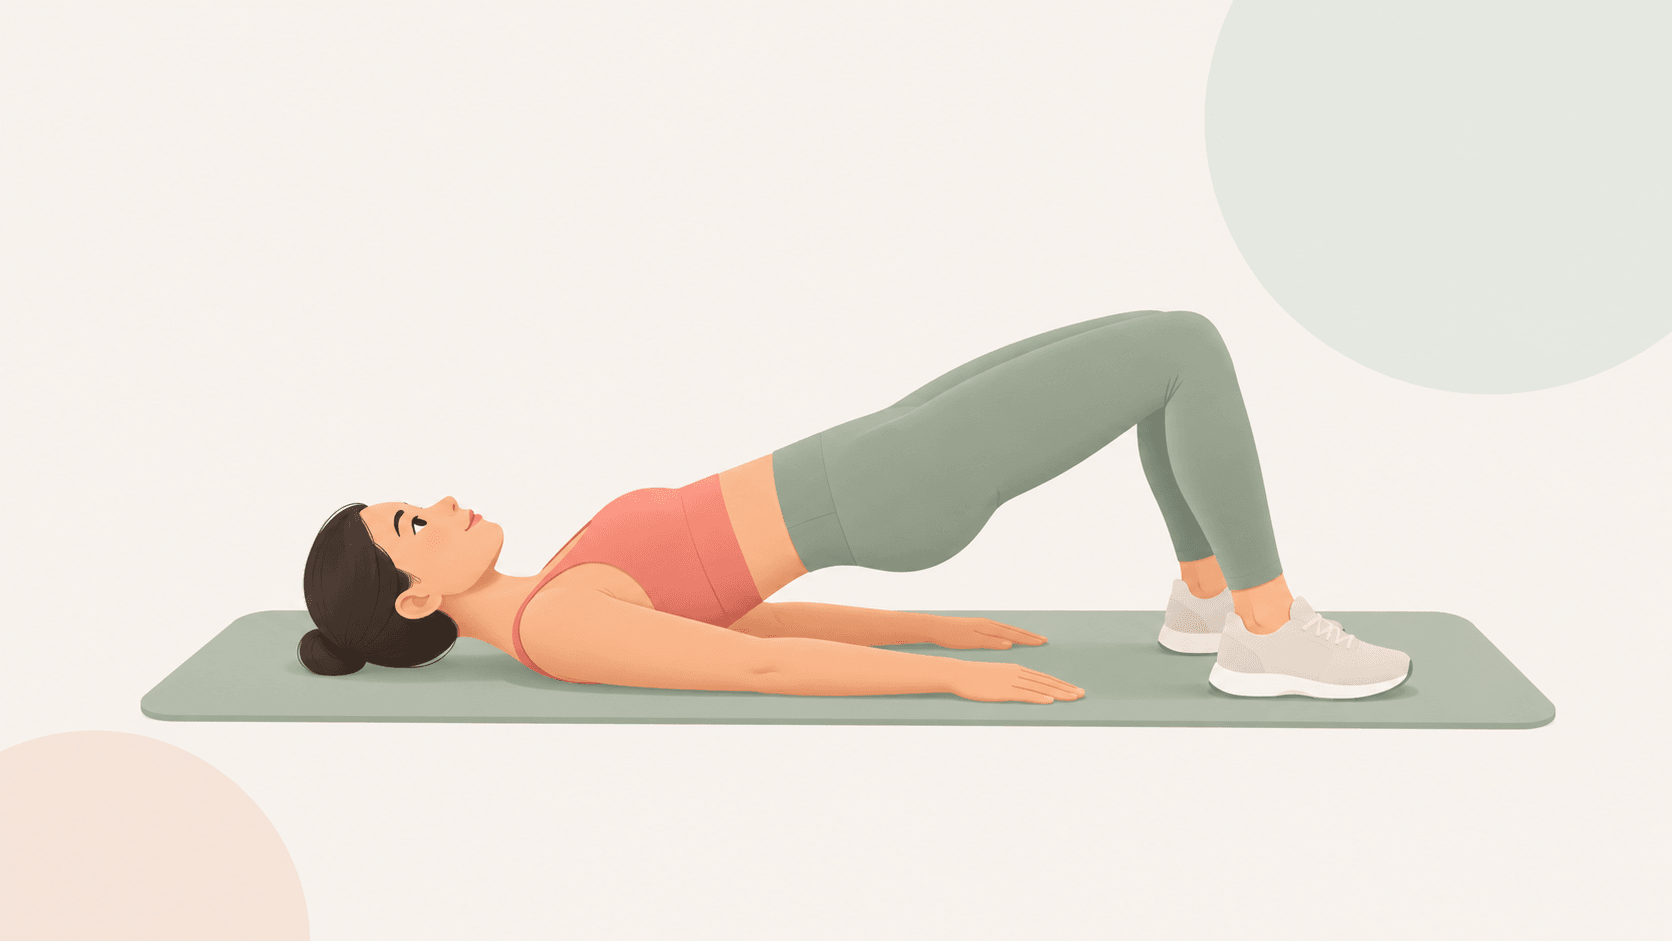
Lie on your back, plant your feet and lift your hips without arching your lower back. That’s the basic glute bridge. Here’s how to make those few inches of movement feel steady, comfortable and worth your time.
A small movement with a useful place in your routine
The glute bridge looks straightforward until you try it. Your hips go up, but perhaps your lower back feels busy, your feet keep moving or you’re wondering whether you should be lifting higher.
You don’t need to solve everything on the first rep. Start with a comfortable setup and a slow lift. Once you know what you’re looking for, the movement is much easier to repeat without second-guessing yourself.
There’s no bench to adjust and no weight to choose. A mat and enough room to lie down are all you need for this version. If you’re learning strength exercises at home, that makes it an approachable one to practise.
What does a glute bridge work?
Your glutes—the muscles around your buttocks—help lift your hips. Your hamstrings, along the backs of your thighs, assist, while your trunk muscles help keep you steady. You’re practising hip extension: bringing the hips out of a bent position.
That movement has a job beyond a workout. The muscles around your hips help with standing up, walking and climbing stairs. Cleveland Clinic’s bridge guide describes the exercise as a way to strengthen muscles used in these everyday activities.
If your goal is stronger glutes, this can be one part of the plan. You’ll still want other movements in your week, rather than expecting one exercise to cover everything.
How to do a glute bridge, step by step
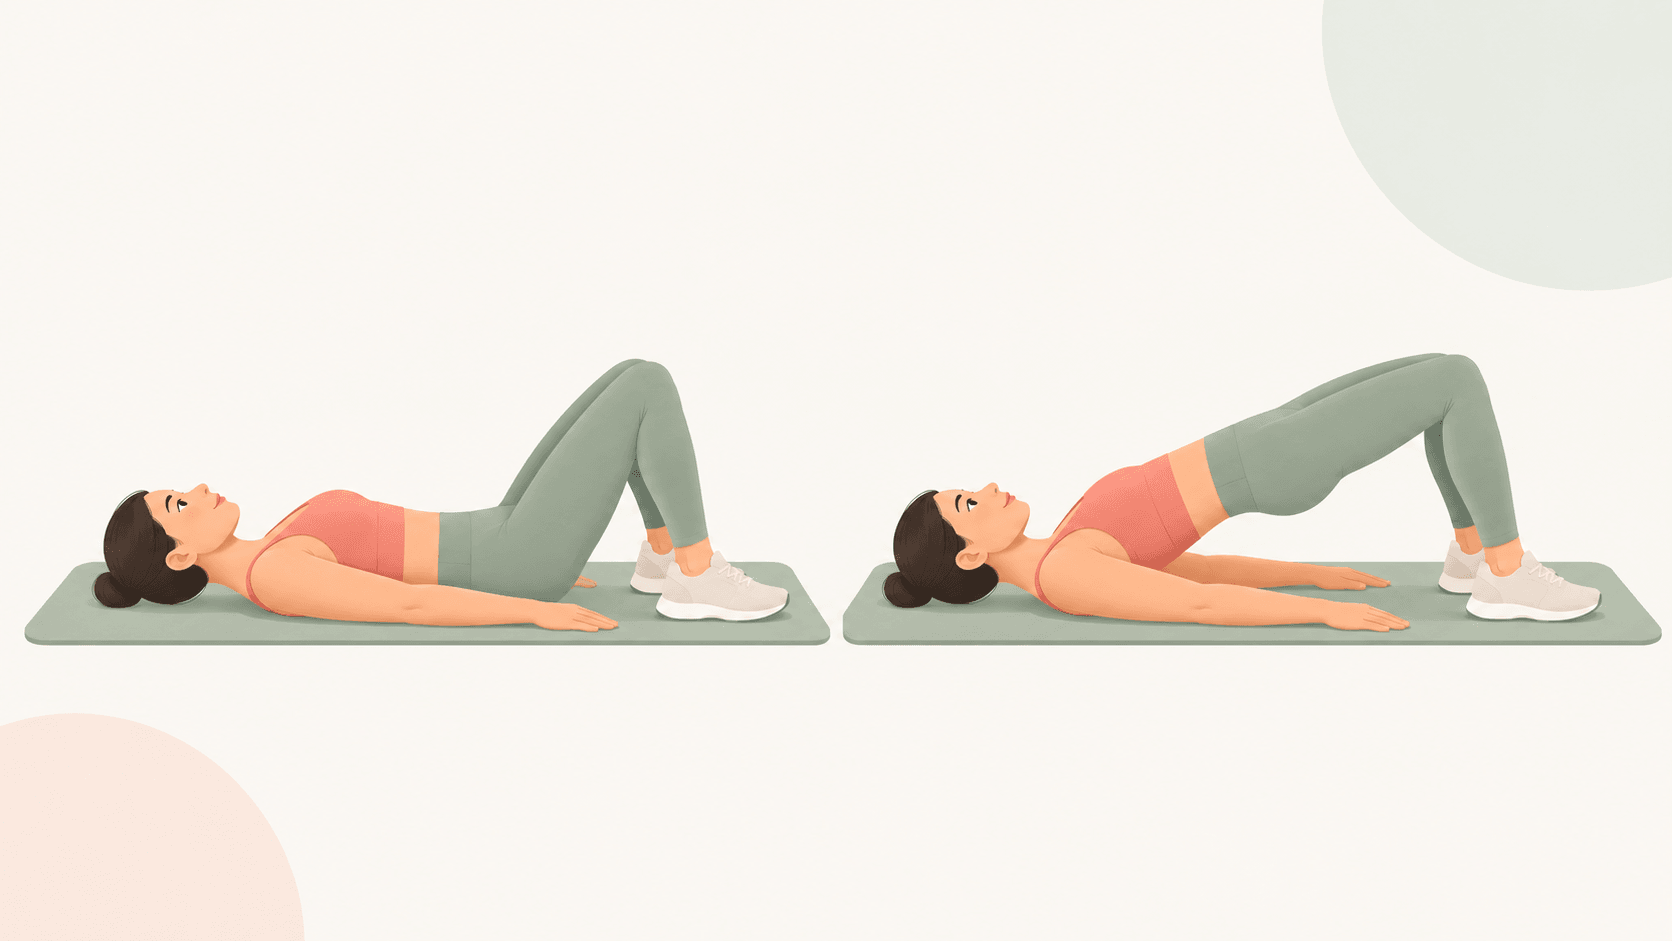
Read through the steps once, then try a few unhurried repetitions. There’s no need to hold your phone over your face while you move.
- Lie down and plant your feet. Bend your knees and place both feet flat, about hip-width apart. Rest your arms beside you, palms down.
- Settle your upper body. Keep your head and shoulders on the mat. Gently tighten your middle while continuing to breathe.
- Lift through your hips. Breathe out, squeeze your glutes and press your heels into the floor. Keep the rest of each foot planted too.
- Find your stopping point. Aim for a gentle diagonal through shoulders, hips and knees. Stop sooner if your back arches or the movement feels uncomfortable.
- Pause briefly. Keep your hips level and knees pointing in the same direction as your toes. You should still be able to breathe.
- Lower with control. Breathe in as you bring your hips back to the mat. Reset before the next lift instead of bouncing straight into it.
The American Council on Exercise emphasises controlled lifting and avoiding an exaggerated lower-back arch. Think of raising your hips, rather than pushing your stomach towards the ceiling.
How high should you lift?
The top position isn’t a contest to get as far from the floor as possible. Mayo Clinic’s form guidance uses the alignment of your shoulders, hips and knees as the reference point, with your back kept neutral.
Try one slow rep and notice when your hips stop rising comfortably. If getting any higher means flaring your ribs or arching your back, you’ve already found a reason to stop. Practise below that point.
A short side-on recording can help you see what you’re doing. Watch it after lowering your hips; don’t turn your head to check a screen while holding the bridge. If you’re still unsure, a qualified trainer or physiotherapist can help you adjust the movement.
If it feels awkward, check these things
Change one thing at a time, then try again. Moving your feet and changing your speed and adding a band all at once makes it hard to tell what helped.
| What you notice | What to try |
|---|---|
| Your lower back is arching at the top | Lower the height, settle your ribs and gently brace before lifting. Stop if there is pain. |
| The backs of your thighs cramp | Lower and rest. Once the cramp settles, try bringing your feet a little closer and squeezing your glutes before lifting. Stop if it returns. |
| Your knees drift inward or outward | Reset your foot position and let your knees follow your toes. Practise without a band first. |
| You rush the lowering part | Count slowly as you come down. End the set when you can no longer control that part. |
Some hamstring effort is expected; those muscles assist the lift. Cramping or pain is different from ordinary effort. The foot-position adjustment above is also suggested in Cleveland Clinic’s form advice. If discomfort keeps returning, have the exercise checked rather than repeatedly pushing through it.
A simple amount to start with
For a first practice session, try one set of 8–12 slow repetitions, or fewer if that’s enough today. Pause briefly at the top and lower smoothly. This is a starting example, not a target you must finish.
Put the exercise into two non-consecutive strength sessions, such as Monday and Thursday. If one set feels manageable and you’re recovering comfortably, try a second set at a later session. Rest long enough between sets to get back into position without rushing.
A useful note afterwards might be: “Eight reps, feet closer, no cramping.” That gives you something specific to return to. It’s more helpful than deciding a workout only counts if you’re sore afterwards.
For general fitness, the CDC recommends strengthening all major muscle groups on at least two days a week, alongside aerobic activity. Bridges cover only part of that. Our seven essential exercises for beginners guide includes pushing, pulling, squatting and other movements to learn alongside them.
When the bodyweight version feels easy
You don’t have to keep adding endless repetitions. First check that you can pause and lower with the same control on the last rep as on the first. Then choose one small change.
Keep the pause a little longer
Try holding the top for a few comfortable seconds while breathing normally. Keep the rest of the movement familiar. If the longer pause makes you arch or hold your breath, shorten it again.
Add a manageable weight
A light dumbbell held securely across the front of your hips can add resistance. Pad the contact point for comfort and hold it with both hands throughout; don’t balance a loose weight and let go. Hospital for Special Surgery includes a weighted floor bridge among its hip-strengthening exercises. Get help with the setup if placing or removing the weight is awkward.
The ACSM’s 2026 resistance-training guidance supports gradually matching training to your goals and abilities. Bodyweight and home-based exercise can be useful; you don’t have to rush into heavier equipment. If muscle growth is your goal, the exercise will need to remain sufficiently challenging as you adapt.
Before you roll out the mat
This is general fitness guidance, not a rehabilitation plan. If you have an injury, ongoing back or hip symptoms, osteoporosis or a recent operation, ask a qualified clinician which movements suit you. During pregnancy or postpartum recovery, get advice about positioning and progression rather than assuming a floor exercise is automatically suitable.
For your next practice, keep the task small: find your foot position, lift slowly and notice where you stop comfortably. A handful of steady repetitions gives you something useful to build on.
Your questions
Are glute bridges a good exercise for women?
Yes, they can be a useful part of a woman’s strength routine, whether the aim is learning a new movement or gradually building stronger glutes. They aren’t a women-only exercise, though. Choose the version and amount of work that suit your experience and goals; there’s no separate technique you need just because you’re a woman.
How many glute bridges should a beginner do?
Try one set of 8–12 controlled repetitions as a first-session example, stopping sooner if your position slips. If that feels manageable and you recover well, add a second set another time. Your starting number can be lower. It helps to finish knowing you could have done another couple with the same control.
Can I do glute bridges every day?
You don’t need to. Two non-consecutive strength days are a simple place to begin. A few gentle practice reps are different from a demanding weighted session, so consider the effort as well as the number. If you’re still sore or your movement feels less controlled, allow more recovery rather than chasing a daily target.
Will glute bridges make my glutes bigger?
They can contribute to muscle growth when the exercise remains challenging enough as you get stronger. Bodyweight bridges may eventually feel too easy, so resistance or other glute exercises can become useful. There’s no reliable promise of a particular shape or size in a set number of days; training, recovery and individual differences all matter.
What is the difference between a glute bridge and a hip thrust?
For the floor bridge in this guide, your shoulders stay on the mat. A typical hip thrust supports your upper back on a bench, changing the setup and allowing a larger hip movement. Both can be loaded, so adding a dumbbell doesn’t automatically turn a bridge into a hip thrust. You don’t need a bench to learn the movement here.
What if a glute bridge hurts my lower back?
Lower your hips and stop the set. Don’t keep lifting into pain to finish the repetitions. If a smaller lift and a more settled position don’t feel comfortable, leave the exercise out and ask a physiotherapist or another qualified clinician for guidance. A bridge is an exercise option, not a diagnosis or a guaranteed treatment for back pain.
References
- American Council on Exercise. Glute Bridge: exercise setup, lifting and lowering cues. acefitness.org
- Mayo Clinic. Exercises to improve your core strength: bridge alignment and precautions. mayoclinic.org
- Cleveland Clinic. Glute Bridges: How To Do Them and Form Tips. 2026. health.clevelandclinic.org
- Hospital for Special Surgery. 8 Exercises to Strengthen Your Posterior Chain. hss.edu
- Centers for Disease Control and Prevention. Adult Activity: An Overview. cdc.gov
- American College of Sports Medicine. Updated Resistance Training Guidelines. 2026. acsm.org
Page history
- Published the beginner glute bridge guide with form instructions, original illustrations and source links.